Thermaltake's Xaser III Skull Series - A Case For the Tough Guy
by Purav Sanghani on March 11, 2004 4:20 PM EST- Posted in
- Cases/Cooling/PSUs
Installation
The Thermaltake Xaser III VM3000A's main feature is its completely screw-less design. Though it can be difficult to deal with some screw-less features, such as drive mounting rails, Thermaltake has done a great job with the design and construction of its chassis.A combination of both plastic and metal snap-ins, clips, and brackets are used in the VM3000A to hold all hardware in place. Metal brackets have been provided with the package to add a new drive easily into one of its 7 usable bays. The brackets themselves are made of steel and are somewhat flexible to allow a drive to be locked in place. A downside to these brackets is that they can be easily bent out of shape if not properly handled.
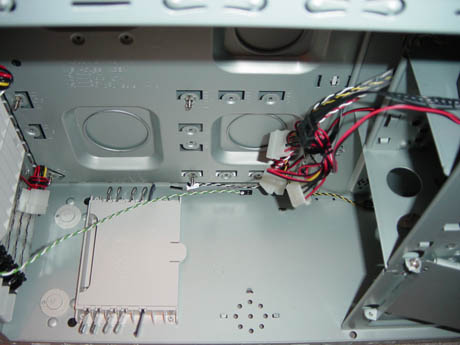
The total time for installation was about 15 minutes for all of the necessary components. A small roadblock that we ran into was the lack of sufficient drive mounting rails. The package includes 5 pairs of rails, which seems incomplete in order to fill all 6 drive bays. The VM3000A, however, does have the traditional holes to mount various drives with screws. Again, the most time consuming portion of the installation was connecting all of the wires from the Hardcano module to the motherboard as well as all of the case fans to the power supply. The USB plugs that go to the motherboard are a bit frustrating to install. All wires are separated by their own plugs, where a better design would have been to group the wires together to end with a single easy install connector.


15 Comments
View All Comments
KristopherKubicki - Thursday, March 11, 2004 - link
Purav has been with us for a couple years, but this is his pilot review :) Congrats Purav - much better than my pilot ;)Kristopher
CZroe - Thursday, March 11, 2004 - link
"The Thermaltake Xaser III VM3000A's main feature is its completely screw-less design. Though it can be difficult to deal with some screw-less features, such as drive mounting rails, Thermaltake has done a great job with the design and construction of its chassis."Umm, I must know: Is it as "great" a job as the ThermalTake Xaser III chassis? I've already posted in the forums about it (See the URL below), but basically the chassis' screwless slot design prevented full-length PCI cards from being inserted even though the case had special slots to stabilize them (Full length PCI cards have a plastic handle which fits the slots).
There aren't enough pictures to tell if the case even has these slots, so I must ask :) Also, a better description of the "swing bar" is needed as well as an image. I'm still confused as to how it can stabilize a PCI card...
http://forums.anandtech.com/messageview.cfm?catid=...
klah - Thursday, March 11, 2004 - link
Hey Purav, have any pictures of the interior with all of the components installed?sandorski - Thursday, March 11, 2004 - link
I got 1 of these cases 3 weeks ago, I really like it. The flashing light is kinda hokey, but overall the screwless design and appearance of the case really impress me. The case looks and feels solid.The review was entirely correct about installing the power supply, it is very difficult if the mobo, cpu, and cpu hs/fa is installed. I managed to get my old noisy 350watt Enermax in, but only after removing the rear fan shroud first.
tfranzese - Thursday, March 11, 2004 - link
Near identical to this SilverStone I looked at, but I dig the SST's looks far more. Anywho, I just wonder if the design flaws were fixed.Case I'm referring to is here: http://www.soundcardcentral.com/reviews/cases/sst-...