Micro-ATX Cases - Shoebox Showdown
by Joshua Buss on January 2, 2007 12:40 PM EST- Posted in
- Cases/Cooling/PSUs
Ultra MicroFly - Interior Cont'd
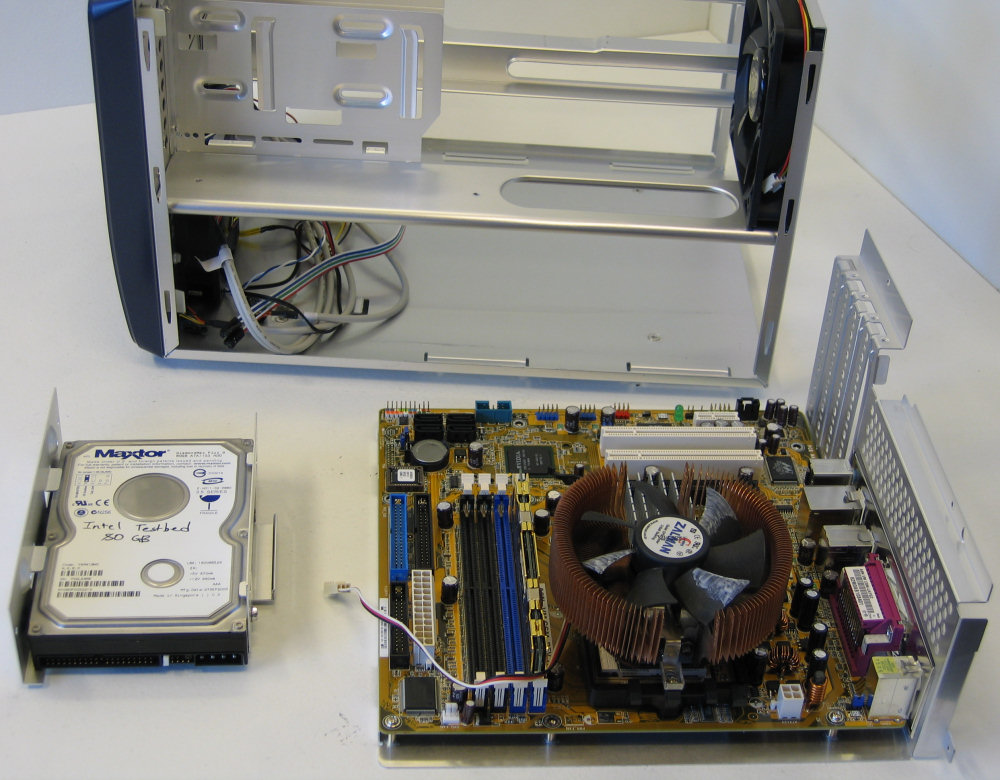
Our first step with the MicroFly's install was putting the hard drive and assembled motherboard into their respective trays.
Like the other clones of this case, the MicroFly just barely works with our CNPS 7000 Cu cooler.
After making sure our CPU cooler would fit, we attached the video card with the single standard case screw and slid the completed motherboard tray into the case all the way. The largest video cards could be difficult to squeeze into the MicroFly, but it handles them better than the Aria.
The included power supply has enough wires for most anything you could fit inside the case, including two 12 volt fan headers
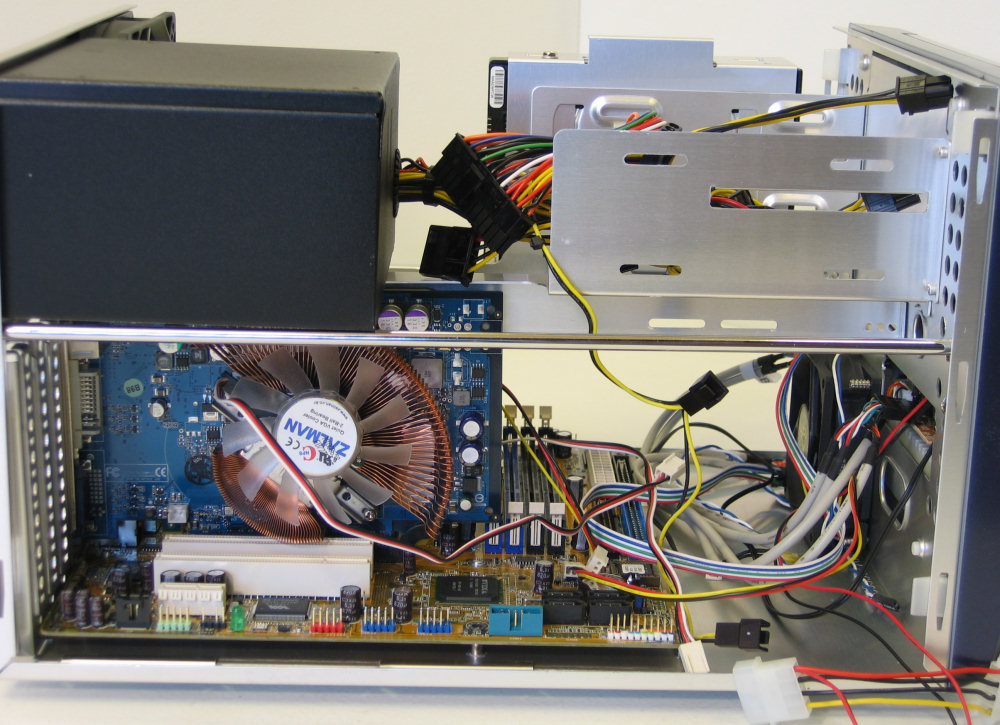
Our completed build from the right side. Like the other cases, there is still a little room for extra equipment in the front bottom, but unlike them there's actually a little space next to the PSU too, so with a little creativity a specialized water-cooling setup could be realized in this case as well.
The LCD display on front shows the temperatures detected by the remote sensor which we attached loosely to our Zalman CPU cooler.

There isn't a whole lot to set the Ultra MicroFly apart from other similar micro-ATX cases, but it still represents a well-designed unit. The low cost of entry is definitely one of the most attractive aspects, and as a whole setting up and using the Ultra MicroFly was uneventful. As you'll see in a moment, the overall performance characteristics of the MicroFly are impressive, with the only potential blemish being slightly higher noise levels at full load.
Our first step with the MicroFly's install was putting the hard drive and assembled motherboard into their respective trays.
 |
| Click to enlarge |
Like the other clones of this case, the MicroFly just barely works with our CNPS 7000 Cu cooler.
 |
| Click to enlarge |
After making sure our CPU cooler would fit, we attached the video card with the single standard case screw and slid the completed motherboard tray into the case all the way. The largest video cards could be difficult to squeeze into the MicroFly, but it handles them better than the Aria.
 |
| Click to enlarge |
The included power supply has enough wires for most anything you could fit inside the case, including two 12 volt fan headers
 |
| Click to enlarge |
Our completed build from the right side. Like the other cases, there is still a little room for extra equipment in the front bottom, but unlike them there's actually a little space next to the PSU too, so with a little creativity a specialized water-cooling setup could be realized in this case as well.
 |
| Click to enlarge |
The LCD display on front shows the temperatures detected by the remote sensor which we attached loosely to our Zalman CPU cooler.
There isn't a whole lot to set the Ultra MicroFly apart from other similar micro-ATX cases, but it still represents a well-designed unit. The low cost of entry is definitely one of the most attractive aspects, and as a whole setting up and using the Ultra MicroFly was uneventful. As you'll see in a moment, the overall performance characteristics of the MicroFly are impressive, with the only potential blemish being slightly higher noise levels at full load.


37 Comments
View All Comments
chucky2 - Tuesday, January 2, 2007 - link
:) Just asking...AlexWade - Tuesday, January 2, 2007 - link
Dear Anandtech staff:Please do more case reviews.
Signed,
Everyone
microAmp - Tuesday, January 2, 2007 - link
I'd like to see them do a review using video instead of text & pictures. I saw one other website do that and it's make a world of difference. Wish I could remember what site it was. :(JoshuaBuss - Tuesday, January 2, 2007 - link
Besides placing an excruciating load on the web servers, I think highly-detailed pictures are better than videos at least in terms of seeing exactly how things look. It's hard to get colors just right in videos, and resolution is normally low enough that some fine details are lost.. I can see where you're coming from though and we'll definitely consider it.. actually seeing things in motion can help get a better feel for some things.mino - Thursday, January 4, 2007 - link
Maybe host them on YouTube ? and consider them just a bonus to regular review...JoshuaBuss - Tuesday, January 2, 2007 - link
Copy that.. ;)In all seriousness, you can expect this section to get a lot hotter soon.. I just finished my last semester of coursework.. w00t.
SonixSquad - Wednesday, September 7, 2011 - link
Just wanted to post my experience having built my girlfriend a system about 5 years ago using the Antec Aria case.I remember it being a pain as it was so cramped and my first (and only) sff build but I got there and it was adequate. I managed to install the board without removing the PSU.
Once I started to monitor temps (was only using stock cpu cooler at the time) I realised it would need some sort of additional cooling intake and the supplied blower was a bit too loud for our liking.
Eventually I found the best air intake solution (without actually modding the case) was to just put a 120mm fan sitting next to the graphics card pulling air in from the rear.
Anyway, back to today 2011 and she still likes the case but the system needs an upgrade so I was looking at parts and having come across this article and seen the Zalman in there snugly fitting with a few mm clear of the PSU I decided to get the newer Zalman CNPS8000A which is low profile and supposedly quiet. I'll post back if it doesn't fit but I think I am going to have to remove the PSU this time around as this cooler needs to be fitted via backplate so it will have to go on before the board is in the case.
This time round she is getting an i3 2100 cpu which should run a lot cooler than the last AMD x2 one and so I'm hoping it will run a lot quieter aswell.
My criticisms about the case would be the same as noted by others. Very cramped and with a lack of decent routing the air circulation is bad. I would have appreciated some thought given to front air intake even if they didn't supply a fan but just somewhere to put one.
Also the PSU only comes with one SATA connector so I will have to get a molex to sata converter so I can power 2 sata devices.I also had some issues with the front audio inputs, at some point they stopped working properly and I still don't know why.